Make Your Own Dot-Grid Bullet Journal for Pennies
by Larry Kollar
So maybe you’re curious about bullet journaling, but you can’t find a dot-grid journal locally. Or you’re too impatient to wait for Amazon to deliver one. Or maybe you want one side with a dot-grid, and the facing page lined or blank (Mason’s preference), or something completely different.
Hey, journaling is supposed to be all about creativity, right? Why not make one yourself? All it takes is a printer, some paper, card stock (or a sacrificial manila folder), scissors, and either glue or a stapler. If you have some specialty tools, like a paper cutter (I like to call them “guillotines”) and a long stapler, it can be really easy. It took me maybe an hour to design the templates, and another hour or two to actually make the journal, and I spent most of the latter hunting up materials.
Starts Off with a Download
First thing, grab my templates. The zip file has two folders:
- US (for printing on letter paper)
- metric (for A4 paper)
The files are .odt (Libre/Open/Neo Office format).
Choose your size and kind and either get to printing,
or go in and customize as needed first.
I used Caveat Brush
for text; you can substitute fonts as you please.
Print 24 sheets, double-sided, which will give you a 96-page journal. If you don’t have a duplexing printer, the easiest thing is to print the odd-numbered pages first, then flip them and stick them back into the printer to do the even-numbered ones. The pages have rules at the top to jot in a page number and title:

Each folder has files named *-dotgrid-index-2up.odt
and *-dotgrid-futurelog-2up.odt.
Print them on each side of a single sheet
to set up pre-printed Index and Future Log pages.
Binding Arbitration
Before you continue, you need to decide how you’re going to bind your journal. There’s two ways to do it, and your selection affects cover measurements.
Saddle Stitch
If you have a sturdy stapler, you can stack all 24 sheets (and the cover) and put two staples down the middle. This has the advantage of letting your journal lay flat, especially when you get halfway into filling it, but you’ll need to trim the edge. Just remember, the middle-most pages will stick out far enough that you might not have any margin left after trimming.
Most people staple from the outside in, but I advocate being a rebel. If you staple from the inside out, you won’t have that lump in the middle. Besides, it’s easy to straighten the ends out then reinforce the spine (and cover the staples) with a length of colored duct tape. Just be careful to line the stapler up straight to get an even spine.
As for the cover, you know it’s going to be 8.5” high x 11” wide (or 210mm x 297mm for A5), since that’s the size of the outermost page. A manila folder is a good source of card stock; or if you have some card stock laying around, use it instead. You can print a design on the cover, if your printer can handle card stock, before stapling it all together. Use a paper cutter to even things up afterwards. If you’re feeling creative, put a flap at the bottom of the back cover, then glue it into place to make a pocket.
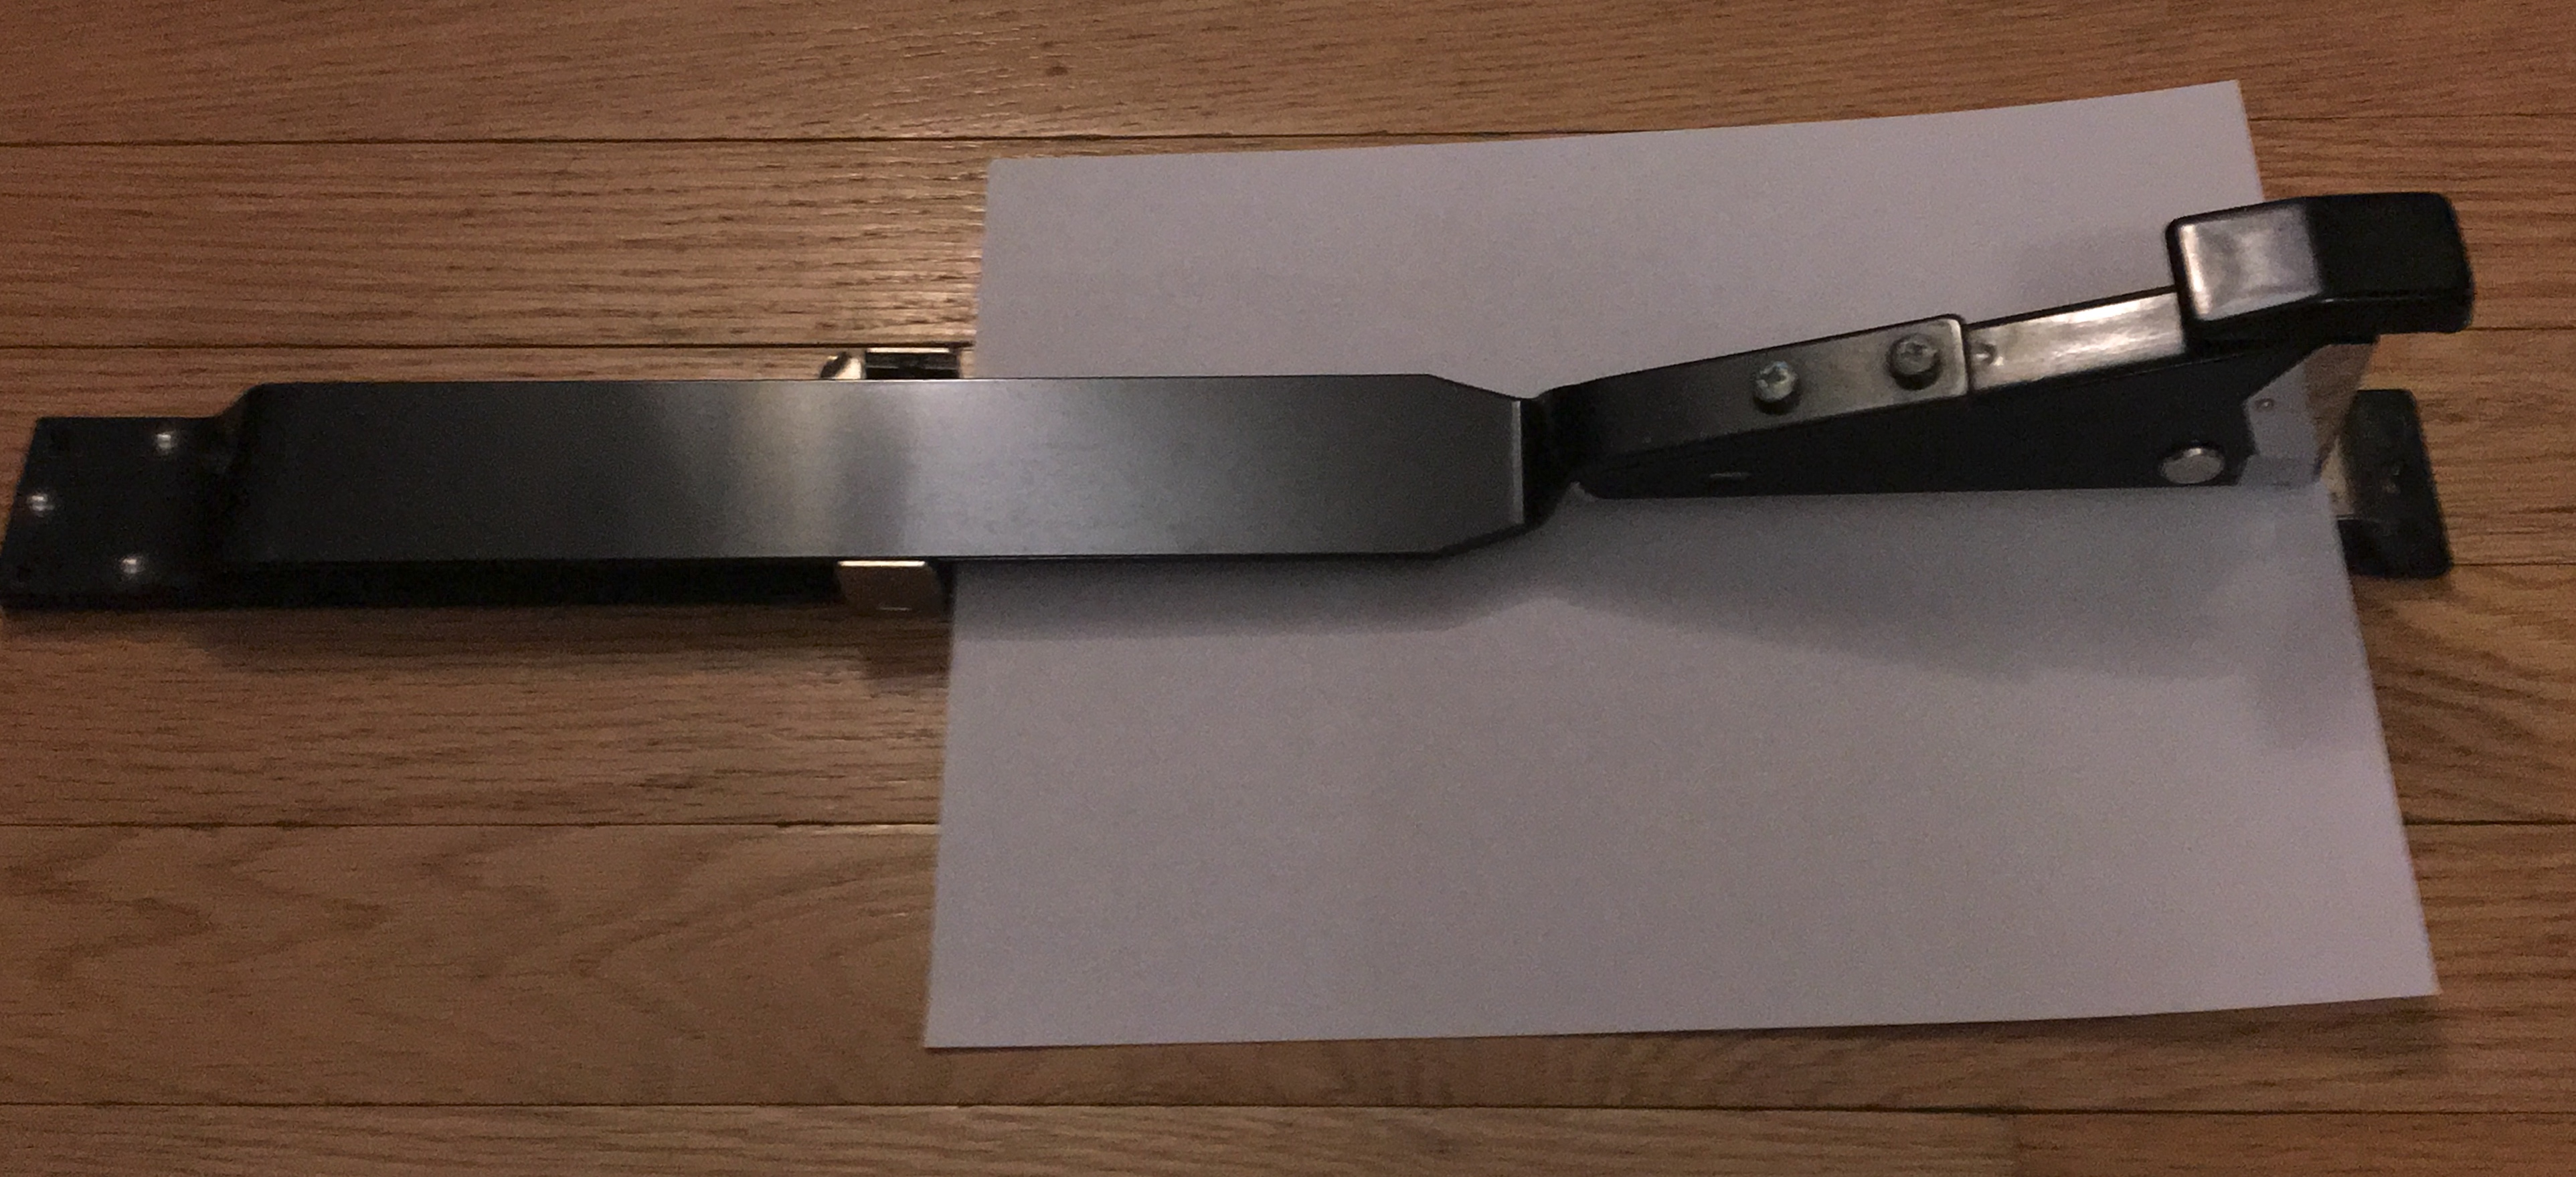
In Case of Short Staplers I found a long-arm stapler at a yard sale for $3 a few years ago, and snapped it up immediately. It’s long enough to put a staple in the middle of tabloid paper (11” x 17”), and has an adjustable guide. Note how it can reach all the way across the long side of a sheet of USletter paper:
If your stapler doesn’t have that kind of reach, never fear. Find something with a firm surface that can still be easily punctured—cork board, a firm mouse pad, or a piece of sheetrock should work. Open the stapler and punch it on through, then bend the ends of the staples down with a spoon or your thumbnail.
Perfect Binding
Your other option is to fold each sheet in half, stack them together, and glue them into the cover. This is called “perfect binding.” It doesn’t lay flat when open, but gives you a more even outside edge and a spine that you can (carefully) write on when you’re ready to shelve your journal. You won’t need a stapler—and if you’re careful, you won’t need a paper cutter, either. Maybe that’s what makes it perfect?
Once you have your sheets folded, stack them and press down on the spine (inside) with a heavy object to get everything as flat as possible. I used one of the wife’s file boxes. A large hardcover book or a 2x4 should work as well.
Now, measure your spine width. If you’re using a manila folder, the creases in the center are… well, perfect for a 96-page journal. Use a straightedge to pre-bend the cover, making the spine. Fill the spine with a slightly thick coat of white glue, slide the sheets in, then make sure everything is even before putting your heavy object back on the bound book to keep everything in place until the glue dries. Afterwards, check the edges and trim where needed.
Ta-da!
You now have a custom journal, and it cost next to nothing! Time to decorate the cover, either with your own artwork or with stickers and glued-on clip art.
The result is sturdy enough—I recently left my journal on top of the wife’s car; she saw it fall onto the road and get run over by another car. I never did find the pen I’d clipped to it, but the journal isn’t coming apart. Check out the tire tracks!
If you make one of your own, I’d love to see what you did. Leave a comment with a link to some pics.
Subscribe via RSS